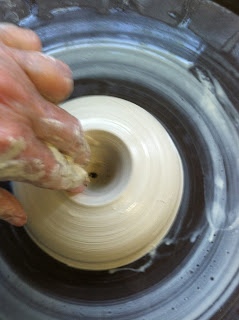
Using about 1 to 1-1/2 pounds of clay.
Center the clay, open without a floor, as if you were going to make a dish that you add the floor with a slab.
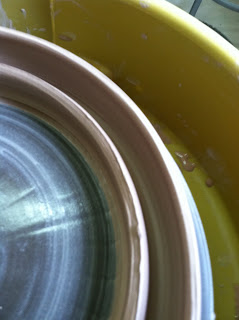
Pull out the clay in a ring, and after you get as far out as is comfortable, then press on top of the ring to form two walls.

I use my fingers, and then gradually pull up just as far as the clay will let me, leaving a bit extra at the top edge (where it will be closed across).
Then gradually push the top edges one at a time, toward the other one..
Just keep pushing, there's a point where some of it is closed and some isn't, just keep pushing.
As you can see, I throw pretty dry, which is really important. Don't enclose a bunch of water inside the ring!
Once the ring is closed, you can form it very easily because of the "balloon quality." I usually trim the bottom as much as possible, then let it sit about 12-24 hours to firm up before cutting off the bat and making it into the shape I want.
Since leather hard rings of clay are pretty strong, it can be cut open crosswise and shaped within a bit of variation of the original curve. Leave a tiny hole somewhere for it to let out gases as it's fired.
This becomes a handle for my teapots that makes a big statement. Incidentally, it makes pouring very easy because the fulcrum when pouring/tiping the pot is so far above and slightly behind the lid.
Thanks to my son, Tai Rogers (a ceramics teacher) who suggested my spout and handle were too large, the next pot will have a littler spout, and maybe the handle too, in proportion to the volume. We shall see. I've got more pots to make...


amazing to throw a handle
ReplyDeleteA friend of mine even makes teapots with a circular shape, adding a little foot, spout and handle to this ring!
DeleteGreat series of pics! A hint for smaller teapot spouts: throw a solid spout shape, hollow it out from the inside with a knife :)
ReplyDeleteThanks for your tip, but how do you get a knife into the solid handle's "inside"? Along the inner circular edge? Or from the ends? You know me, I need a picture. I can see slicing delicately along the inside of the circular form if it's straightened out, but not curved.
Deletegreat tutorial!
ReplyDeleteOh boy, this is something I have to try!! Thanks
ReplyDeletegreat pics,, like you I like the visual instructions... I've seen a few different uses for this style of throwing... potters are an inventive lot..
ReplyDelete