I wanted to make a teapot which would hold enough for a couple of mugs-worth, and maybe 4, in case friends wanted to share a pot. Mugs are generally 10-12 oz. So my goal was 40-48 oz. Yes, I made it, and it pours without a dribble (another potter's goal!)
Glazed in shiny green with some areas of white sponged into it, it both has translucence over the white clay, as well as some interesting flows of color blending. Unfortunately, shiny glazes are really hard to photograph!
A little crack appeared by the handle (look closely at the white area.) It won't keep it from functioning, but alas, it makes it a second.
With all the reflected light, it's hard to see the other crack at the other end of the handle. These were in the finishing clay which were just coils to smooth the handle around the pot.
Sunlight below gives a bit of a chance to see the changing colors of these glazes.
A bit of a tipsy spout, eh? The spout always does a bit of "unwind" from when it was thrown on the wheel, and I thought I'd corrected for that, by making its opening a bit skewed...but either that was the wrong direction or I didn't do it enough!
Maybe I'll try some indoor shots, but diffuse light may not work.
Copyright and other blogs currently being worked
ALCHEMY OF CLAY: Art and life connect! This fabric design is by Amanda Richardson - British fabric & textile artist in Penberth Valley, Land's End, Cornwall, England, UK
My info
Showing posts with label Teapot. Show all posts
Sunday, March 22, 2020
Friday, March 6, 2020
A teapot waiting to dry
It was thrown in pieces, then assembled. Then another piece was thrown. And now it's drying slowly on one of those baker's racks for clay.
I made it rather large, because I have one like it which I made a few years ago, and love to make tea in it, but it only holds 2 mugs worth.
Of course I could make some smaller cups to drink tea in. But I like a big mug-full. So why should I change my tastes? I can just throw a bigger teapot.
I made it rather large, because I have one like it which I made a few years ago, and love to make tea in it, but it only holds 2 mugs worth.
Of course I could make some smaller cups to drink tea in. But I like a big mug-full. So why should I change my tastes? I can just throw a bigger teapot.
Sunday, March 1, 2020
NCECA
You may notice on the side of my blog to the right, is a list of other blogs I like to read (follow perhaps) and one is about the big pottery conference held in the US every year, NCECA, (say "N"-See-Kah."
But my eye was caught last week by a post from them with a nice exhibit...and so I'll offer it to you as well Here.
Joan Ulrich, Workhouse Art Center - London
The conference is in Richmond VA this year...though the web site I went to had more links to past conferences. You probably have to already know what to look for. I was just looking for eye-candy, which the conference usually has in spades!
Tuesday, October 24, 2017
Latest things gathering together
| Monarch teapot - $60 |
| Monarch medium mugs - $25 |
| Tulip cookie jar - $55 |
Black Mountain is having a great little art show. All kinds of crafts that are selected by a jury, so there isn't anything just pulled from the back of anyone's closet (I hope.)
| Tulip Mugs - $28 each
These are mostly new things I've made in the last few months. Hope to see you in Black Mountain down by the Old Depot, Oct 28, 10-5 !
|
Today's Quote:
You wouldn't worry so much about what others think of you if you realized how seldom they do. Eleanor Roosevelt
Monday, October 9, 2017
Mugshot Monday
Remember my lonely little teapot with Monarchs on it? It didn't have any mugs or cups that went with it.
Ah, but I'm still able to make mugs. Voila'
Yep, there are three of them. That's about a teapot full of nice hot tea. Can't wait to wrap my hand around one of those mugs!
Quote for today:
Ah, but I'm still able to make mugs. Voila'
| I made the one finger handle, for the first time. |
Quote for today:
When
we come full circle there is the feeling that we have come to a familiar place
but we are somehow different. Madisyn Taylor
Labels:
butterflies,
Monarchs,
mugs,
one-finger-handles,
Teapot,
yellow
Monday, May 8, 2017
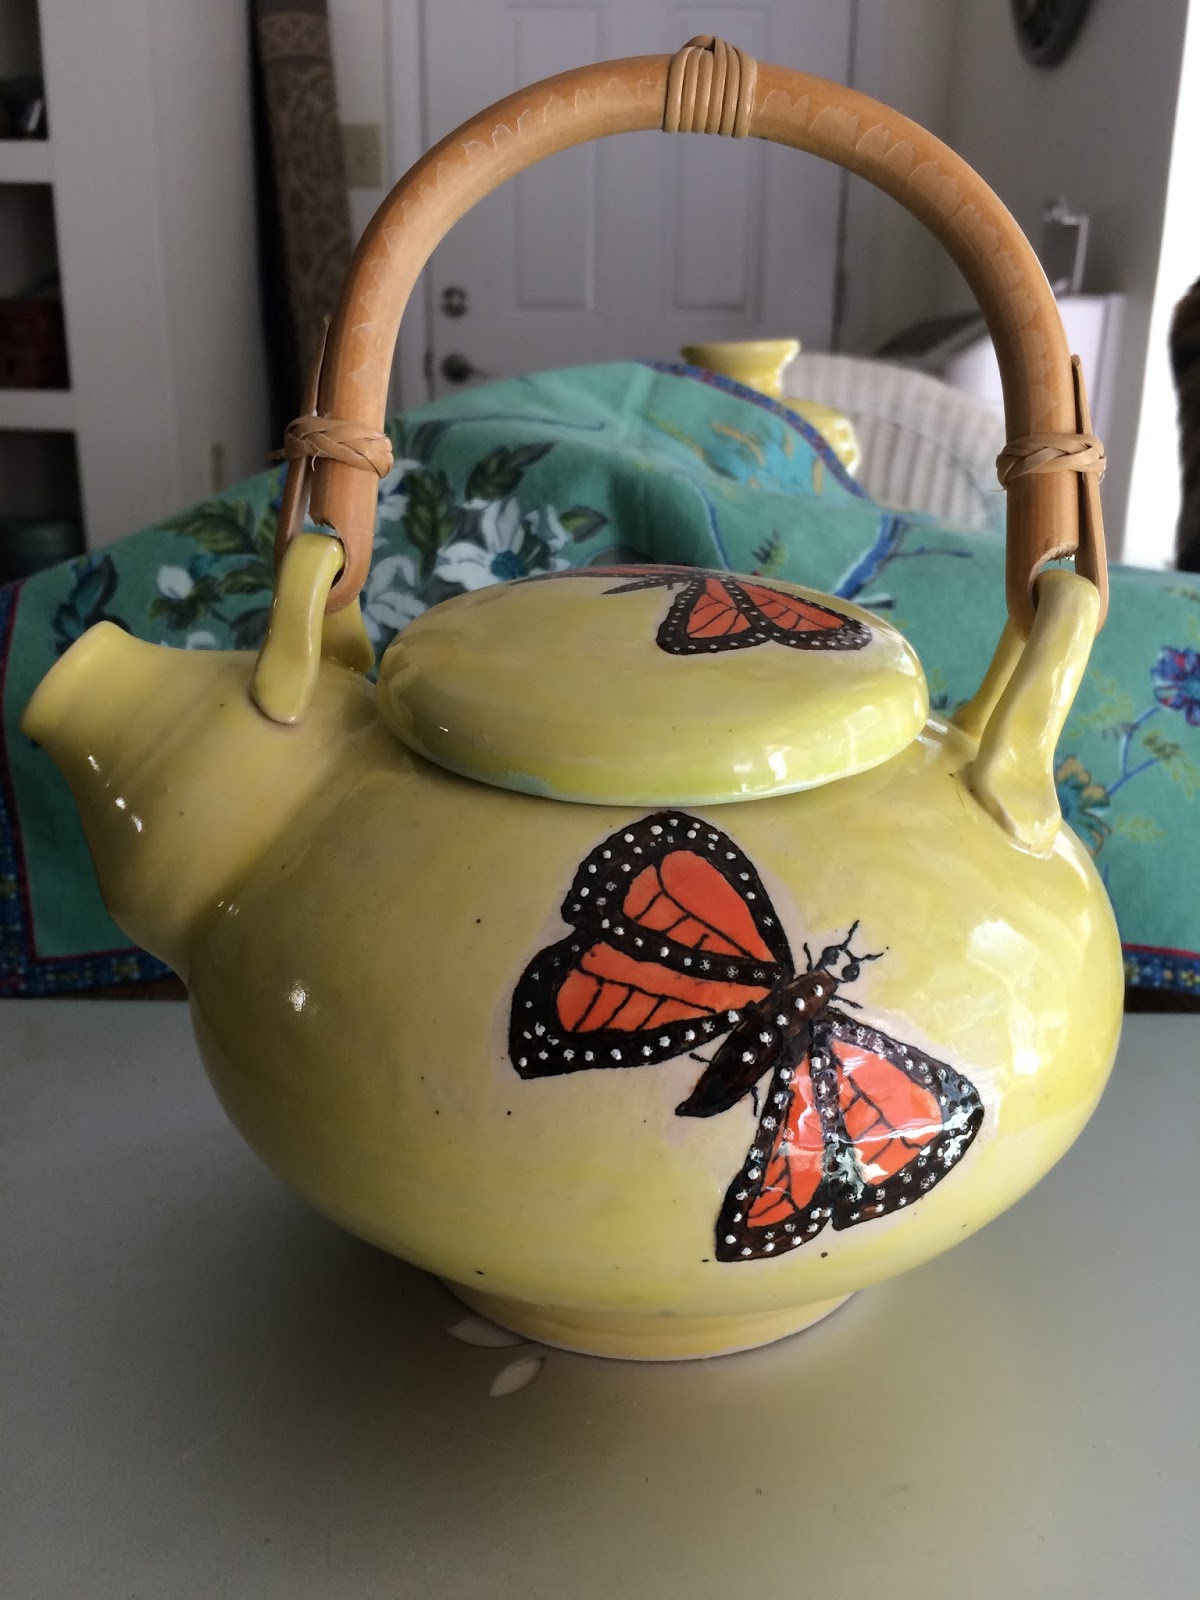
A teapot with butterflies!
Here's the yellow teapot with Monarchs hand painted on it and the lid!
I'm very happy with the results. It's a seven cup teapot, and soon the handle will be applied!
And it doesn't drip from the first pour...a good sign! Glaze is Mayco Butter Yellow, (2 coats) with Stroke N Coat for butterfly, outlined with Designer Liner.
I know it will go home with someone soon. That's what this game is all about, sharing beauty and smiles with other folks who also love pottery that's handbuilt!
Interior is our community studio's celadon glaze.
Today's quote:
To attain knowledge, add things
everyday. To attain wisdom, remove things everyday.” — Laozu, Philosopher.
Sunday, May 7, 2017
Tips for glaze painting butterflies again
Painting more monarch butterflies on a teapot and a vase...not with underglaze, not with paint, but with real glazes and a tiny-tip applicator of a glaze!
I had a friend watch me as I used the designer liner by Mayco. (Here shown not being used to make a line, with the push pin in the metal tip). One of the big things about using small applicators or containers, is that they dry out easily. I store my little glaze bottles upside down, and I clean out the tips of the Designer Liners before starting application. I tried taking them off and storing them with the little plastic caps that came with them, but prefer the pins in the tips.
I showed how I squeeze as I slowly move the metal tip along at an angle, not directly square to the surface. And every second or third pull (never push) I'd clean the clay off the tip on a damp sponge, then start the line again on a scrap of plastic lid. That way the little bits of bisque clay that get in the nozzle don't clog it up and cause big blobs. However, blobs do occur at the beginning of each line as I put the tip onto the clay. I go back and smooth them into more or less even width with the tip of an exacto knife blade.
It really helps to have a very smooth surface, since even small throwing lines caused by my fingers or a rib tool can catch the little metal tip and make jagged lines...like the bottom line on the butterfly above.
But the really tough part of this procedure is painting each area of color with several coats of Stroke N Coat glazes by Mayco.
Fortunately the black lines in the area which will be painted orange will show through the glaze, so I don't have to avoid painting on top of them. I'd surely stop painting these butterflies if that were the case. I go over the finished butterflies with clear matt glaze, then a coat of liquid wax before dipping the whole pot into a vat of glaze. Or if I'm brushing on the glaze, I can skip the wax part.
Here was a post several years ago about this procedure.
Yes, I'll show you the finished product tomorrow, when it's been fired. And here is what it looks like while it's waiting to be fired. The teapot will be yellow with celadon interior, and the vase is Floating Blue inside and out.
Today's quote:
The sense of feeling
bored in life can be an indicator that we need to be proactive in creating
change. Daily Om
Labels:
butterflies,
Designer Liner,
glaze painting,
Mayco Stroke and Coat,
Teapot,
vase
Subscribe to:
Posts (Atom)